Security Tools

Secure Data and Network

Shield your data from unauthorized users with LUKS disk encryption.

Shield your data from unauthorized users with LUKS disk encryption.

Please read the disclaimer before proceeding. We review and update guided solutions regularly. If you have suggestions or requests, please write support@kfocus.org.

Ubuntu Pro

What Is Ubuntu Pro

Ubuntu Pro is a subscription service which provides an extra layer of security and compliance features to Ubuntu LTS derivatives like Kubuntu. Features such as Extended Security Maintenance (ESM) and LivePatching provide the greatest benefit in long-lived server environments.

Support Policy

Kubuntu Focus DOES NOT SUPPORT the use of Ubuntu Pro with free support. Focus customers with a paid MSP contract, however, can choose Pro support for their servers or fleets.

Disable Terminal Messages

When upgrading packages from the CLI, you might see a message like the following, encouraging you to enable Ubuntu Pro:

#> Get more security updates through Ubuntu Pro with 'esm-apps' enabled: #> libimage-magick-perl imagemagick...

You can toggle the message as shown below:

# Disable terminal messages sudo dpkg-divert --divert /var/lib/kfocus/esm-redirect.conf --rename /etc/apt/apt.conf.d/20apt-esm-hook.conf # Enable terminal messages sudo dpkg-divert --rename --remove /etc/apt/apt.conf.d/20apt-esm-hook.conf
Check Ubuntu Pro Status

In a terminal, type pro status. If you see This machine is not attached to an Ubuntu Pro subscription, then Ubuntu Pro is NOT enabled.

Disable All of Ubuntu Pro

If you have enabled Ubuntu Pro and upgraded your system thereafter, rolling back can be difficult. For example, using ppa-purge to remove the two Pro repositories reportedly removes important system files. If you are using a 24.04 LTS (Noble) system with BTRFS, you may be able to restore your system to its previous state using System Rollback. Otherwise, it's probably best to back up your data and perform a clean install. Below is a non-exhaustive list of steps you might need to do otherwise:

Full Disk Encryption

Change Passphrase

Visit the Welcome Wizard to change your encrypted disk passphrase using a GUI. Whenever you change the passphrase, type it carefully and keep a copy somewhere safe because THERE IS NO WAY TO RECOVER THE DISK IF THE PASSPHRASE IS LOST!

You can also change the passphrase using the command line as shown below:

# /dev/nvme0n1p3 is used as an example. # The actual device may vary. sudo cryptsetup luksChangeKey /dev/nvme0n1p3; #> Enter passphrase to be changed: #> Enter new passphrase: #> Verify passphrase:
View Key Slots

One key is used for normal encryption, and two if using a YubiKey. Typically, slot 0 is your passphrase, and slot 1 is used by Yubikey. (On 22.04 LTS (Jammy) systems, slot 1 is a randomly generated string created by the installer, and is not generally useful. On such systems, slot 2 is used by YubiKey.) You may see all the slots, find the one using your passphrase, and carefully remove slots using the following:

# List slots in use sudo cryptsetup luksDump /dev/nvme0n1p3 |grep -E ' *^s*[0-9]: luks2'; #> 0: luks2 #> 1: luks2 # Find slot for a passphrase sudo cryptsetup luksOpen --test-passphrase -v /dev/nvme0n1p3 #> Enter passphrase for /dev/nvme0n1p3: #> Enter passphrase for /dev/nvme0n1p3: #> Key slot 0 unlocked. #> ... # Remove a slot not in use (CAREFUL!) sudo cryptsetup -v luksKillSlot /dev/nvme0n1p3 1; #> Keyslot 1 is selected for deletion. #> Enter any remaining passphrase: #> Key slot 0 unlocked. #> Key slot 1 removed. #> Command successful.

Make sure your data is backed up before changing or removing keys. Use the luksDump command as shown above to ensure the slot has been removed.

Add a New Passphrase
# Add a new key to a LUKS parition sudo cryptsetup luksAddKey /dev/nvme0n1p3

YubiKey

YubiKey

If you purchased a pre-configured YubiKey you won’t need this except to change your password. The YubiKey documentation may be found here.

1. Setup
# Become the root user sudo -i; # Confirm the encrypted partition ls /dev/nvme0n1p3; # Find an open LUKS key slot # Slots 1-7 show as open cryptsetup luksDump /dev/nvme0n1p3;
2. Install Necessary Packages
apt install yubikey-luks
3. Configure YubiKey

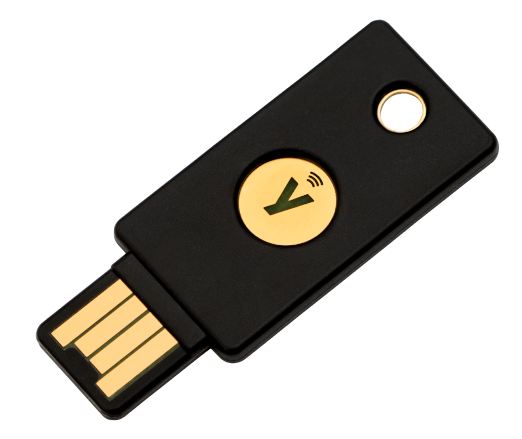
Insert the YubiKey into a USB slot. The center LED should flash once. It will not stay illuminated. As you use the key, the LED will flash under other circumstances.

ykpersonalize -2 -ochal-resp \ -ochal-hmac -ohmac-lt64 -oserial-api-visible; #> #> Firmware version 5.2.4 Touch level 1283 Program sequence 3 #> #> Configuration data to be written to key configuration 1: #> #> fixed: m: #> uid: n/a #> key: h:50d779456fb7325fd91f2c543092b5178c4174cd #> acc_code: h:000000000000 #> OATH IMF: h:0 #> ticket_flags: CHAL_RESP #> config_flags: CHAL_HMAC|HMAC_LT64 #> extended_flags: SERIAL_API_VISIBLE # #> Commit? (y/n) [n]: y
4. Create Config File (Optional)

The default /etc/ykluks.cfg file should be fine. However, you may customize it as you see fit.

5. Save LUKS Config to Key Slot

Enroll your YubiKey to a LUKS slot:

# Enroll to slot. If slot is taken, try the next with -s 2 yubikey-luks-enroll -d /dev/nvme0n1p3 -s 1; #> setting disk to /dev/nvme0n1p3. #> setting slot to 1. #> This script will utilize slot 1 on drive /dev/nvme0n1p3. If this is not what you intended, exit now! #> Adding yubikey to initrd #> Please insert a yubikey and enter a new password. This is the password that will only work while your yubikey is installed in your computer. **************** #> Please enter the yubikey password again: **************** #> You may now be prompted for an existing passphrase. This is NOT the passphrase you just entered, this is the passphrase that you currently use to unlock your LUKS encrypted drive. #> Enter any existing passphrase:

Enter an EXISTING disk passphrase.

6. Modify Crypt Table

Modify /etc/crypttab to include the keyscript option as shown. IMPORTANT! THE DISK UUID YOU SEE WILL BE DIFFERENT - DO NOT CHANGE IT! Also make sure the entry is on a single line in the file, even if it wraps in the codeblock below.

nvme0n1p3_crypt UUID=98cfc3a4-dfd8-4cb4-8016-a3a62649d5a0 none luks,keyscript=/usr/share/yubikey-luks/ykluks-keyscript,discard

You can verify or recover the UUID by using lsblk --fs |grep 'crypto_LUKS' and then using the uuid of the correct volume. The partion for standard installations is typically /dev/nvme0n1p3.

7. Update System RAM Disk
# update the initial Ramdisk # Append `-k all` to update all kernels. # update-initramfs -u;
8. Reboot and Test

Reboot and insert YubiKey on the initial passphrase screen to test your password. You should be able to use your YubiKey passphrase or your regular passphrase. We suggest you always keep the first passphrase but ensure it is long and complex. This provides a method to use the system even if you lose your YubiKey. As always, store your passphrases safely.

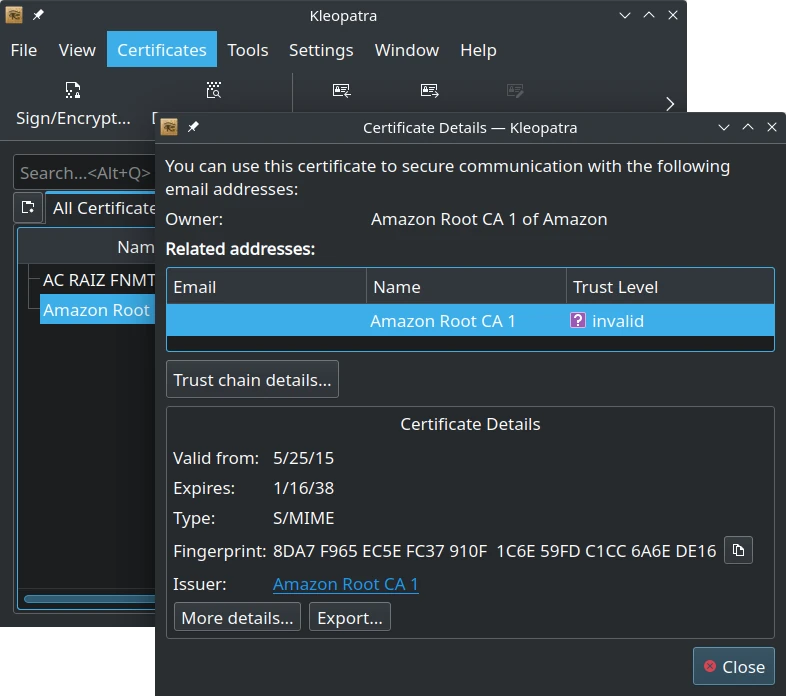
Kleopatra

Kleopatra is a certificate manager and a universal crypto GUI. It supports managing X.509 and OpenPGP certificates in the GpgSM keybox and retrieving certificates from LDAP servers.

Secure Shell & VPN

Secure Shell & VPN

Secure Shell (SSH) is a versatile tool. One can use it for remote access, port forwarding, tunneling, and secure file transfers. Many graphical tools support SSH. For example, the Dolphin file manager, can use SFTP for secure file transfers. A default configuration is provided and annotated in .ssh/config for all new users. You may study it to see how to maintain constant connection and add shortcuts for specific hosts.

OpenVPN is installed so you can easily access a common Virtual Private Network solution. Many other VPN clients are available by their developers. To provide secrets to the Fortinet VPN client, see the this section of the Passwords Managemet guide.

Manage keys and certificates with Kleopatra.

Manage keys and certificates with Kleopatra.

Troubleshooting

Content will be added as needed.

Revisions

This is a partial revision history. See the git repository for all entries.

Disclaimer

We try hard to provide a useful solution validated by professionals. However, we cannot anticipate every situation, and therefore cannot guarantee this procedure will work for your needs. Always backup your data and test the solution to determine the correct procedure for you.

THIS SOLUTION IS PROVIDED BY THE COPYRIGHT HOLDERS AND CONTRIBUTORS “AS IS” AND ANY EXPRESS OR IMPLIED WARRANTIES, INCLUDING, BUT NOT LIMITED TO, THE IMPLIED WARRANTIES OF MERCHANTABILITY AND FITNESS FOR A PARTICULAR PURPOSE ARE DISCLAIMED. IN NO EVENT SHALL THE COPYRIGHT OWNER OR CONTRIBUTORS BE LIABLE FOR ANY DIRECT, INDIRECT, INCIDENTAL, SPECIAL EXEMPLARY, OR CONSEQUENTIAL DAMAGES (INCLUDING, BUT NOT LIMITED TO, PROCUREMENT OF SUBSTITUTE GOODS OR SERVICES; LOSS OF USE, DATA, OR PROFITS; OR BUSINESS INTERRUPTION) HOWEVER CAUSED AND ON ANY THEORY OF LIABILITY, WHETHER IN CONTRACT, STRICT LIABILITY, OR TORT (INCLUDING NEGLIGENCE OR OTHERWISE) ARISING IN ANY WAY OUT OF THE USE OF THIS SOLUTION, EVEN IF ADVISED OF THE POSSIBILITY OF SUCH DAMAGE.

HAVE QUESTIONS?Call 844-536-2871 or write
TellMeMore@kfocus.org   |  GET FOCUS MERCH